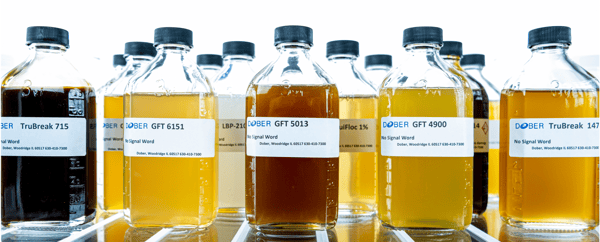
Skip to content

WATER TREATMENT JAR TESTING MADE EASY

What Is A Jar Test?

Water treatment jar testing is a method of mechanically and physically testing chemical treatments on samples of wastewater to determine the optimal chemical treatment and related chemical dosages for a specific water or waste stream. Essentially, jar testing is a scaled down version of a water treatment system. It is great for getting a “snapshot” of what will be needed to treat the water on a larger scale. It is important to note that, just because a certain treatment will work during jar testing, on-site trials and scaling up is required to confirm the recommended program and determine if adjustments are needed.


Can I Skip The Jar Test?


We don’t recommend it!

The Jar Test  is the single most important tool used in determining the best chemical path for achieving individual water treatment goals. Through jar testing, you are able to test how specific chemicals will function within your treatment system in order to determine what chemicals are best for your specific application. The test not only saves time, but it saves money, as well. Through jar testing, you can test different treatment dosages to ensure you are not overusing and overspending on chemicals.

Jar testing is also useful because it can help you determine what a specific waste stream consists of, along with whether the sample of wastewater will require a pH adjustment, filtration, or different chemical load than originally expected. Every wastewater sample has a unique composition, requiring a unique treatment. Jar tests are the best and most efficient way to determine the best treatment system.

Our Products

This guide is intended to help you easily navigate our companies products in the industrial water treatment industry. 

We highlight each of our water treatment product lines as well as the products associated with them.

Download Our Product Catalog

WT Catalog

Testing Equipment

To do extensive jar testing, it is best to use what is called a gang stirrer. (We recently broke down the pros and cons of six stirrers on the market.) A gang stirrer is an instrument that can stir multiple beakers of water at a time, so multiple different chemicals or dosages can be tested on a sample at once. The instrument also ensures that the mixing is uniform throughout the samples. However, you can still complete a jar test without access to a gang stirrer. Grab a beaker, or another container, to hold the water, and find something that can be used to mix the water thoroughly.

Once you have your stirring system setup, you will need to acquire the chemicals that you plan to test on the water. The chemicals should include a coagulant, flocculant, or both. Sometimes an acid or base is also needed due to certain waste streams requiring a pH adjustment to be treated.

Other equipment required for effective jar testing includes syringes, pH meters, magnets, a notebook, and a pen.

Full List  of Jar Testing Equipment Required:

    • Mixing device (Gang stirrer if available, otherwise magnetic mixing plates)
    • Glass Beakers, bottles
    • Syringes
    • pH meter or pH paper
    • Chemicals
    • Timer
    • Graduated Cylinder
    • Magnets (for mixing plates)
    • Notebook
HK Lab Jar Test 2-22


Jar Testing Chemical Selection

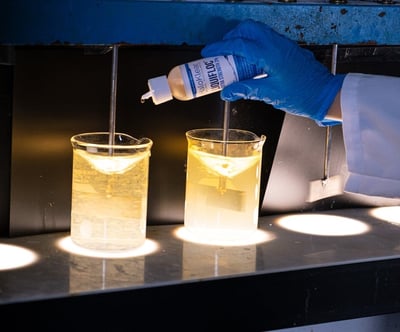
Typically, when completing a jar test, two different chemicals are used. The pH of the wastewater being used in the test may also need to be adjusted. The sequence of chemical additions is important.

  • pH Adjust – Sometimes coagulants and flocculants will not work at a certain pH. Sometimes an oily waste stream requires what we call an, “Acid crack.” This is when you adjust the pH of the oily water with acid, and those oils are pulled out of the water. This makes treatment much easier. After acid cracking, you can bring the pH back up to a desired level with a base or caustic soda.
  • Coagulants have positively-charged molecules and, when added to wastewater, they destabilize the negatively-charged particles in the water. The process of coagulation creates “pin flocs.” Pin flocs are small, neutrally-charged molecules. Pin flocs will eventually settle, but they may stay suspended longer than larger floc particles would, because pin flocs are not as heavy.
  • Flocculants have longer polymer chains than coagulants do; therefore, they link more particles to a polymer chain. Flocculants will create macrofloc, which are clumps of solids larger than pin flocs. Macroflocs will settle faster than pin flocs because they are heavier.

Jar Test Chemicals

Conducting a Jar Test

To begin, make sure you understand the goals of your test. What are the treatment goals for the water? What is currently being used for treatment? Is the water in a DAF tank? Will it be run through a filter? All of these questions can greatly aid in the jar testing process and save you time.

Next, collect a representative sample of the waste water. A representative sample means the sample has been mixed very well, and that you are collecting from the bottom up. Having a representative sample ensures you are getting a full profile of the wastewater. If you collect water from the top of a sample, you won’t be getting material that has settled or that has a greater density.
Now, place your water into 4-6 600 mL beakers. Fill the beakers up to 500 mL.

Place your samples on the instrument you are using to mix, such as a gang stirrer with numerous paddles. Set the mixing time on the stirring instrument to reflect how it would be mixed in treatment, or set a timer if you are without a gang stirrer.
Gather your chemicals. This can include pH adjusters, such as sulfuric acid and caustic soda, as well as your coagulants and flocculants. If the water is oily, you may also have an oil emulsifier.

While the water samples are being stirred, check the pH of the sample. This will help determine if a pH adjustment is needed. Caustic soda will increase the pH, and an acid such as sulfuric acid will lower the pH. We recommend checking your coagulants and flocculants to see what pH they work best at. Review any necessary background information, as well. Sometimes water must be at a certain pH depending on the company or waste stream you are getting it from due to different needs and regulations.


Once the optimal pH is achieved, it is time to screen your coagulants. The coagulants need to be diluted in order to accurately dose them. This is done by adding 10% of the coagulant to 90% water and mixing, creating a 10% coagulant solution. (Example: 10 mls of coagulant into 100 mls of water would be a 10% solution). With this solution, every 1 mL added to the 500 mL of water equates to 200 parts per million (PPM) of chemical. One drop of this will be equal to 10 ppm of chemical.

Next, line up the coagulant solutions that you wish to test, one in front of each beaker. In each beaker, add 10 ppm of chemical, or one drop from 1 mL syringe. Mix at 100 rpm for 1 minute. Note that rpm and mix times will vary depending on actual operating parameters. After 1 minute, stop mixing and observe. At the coagulation phase, we are looking for small or micro-particles often referred to as a “break”. The amount of particles combined with the level of clarity in between those particles can indicate adequate chemical dosing. Continue dosing and mixing at 10-20 ppm increments until the desired amount of particles and level of clarity is achieved.


Once it is determined that an optimum coagulation dosage has been achieved, the next step is to dilute a flocculant. The flocculant needs to be mixed with water to make a solution. Typically, a 0.25% solution in water is created. The solution can be achieved by taking 1.25 ml of flocculent, adding it to 500 ml of water, mixing thoroughly by shaking or mixing. Adding 1ml of a 0.25% solution of flocculant to 500 ml of water equates to a dosage of 5 ppm.

In each beaker, add 1ml of the flocculant solution and mix for 1 minute at an rpm of 75. During the addition of a flocculant, look for large floc particles called macro floc that are popcorn-like in appearance, well-formed, and separated from each other. Stop the mixer after you see large floc particles form.

To know if the water meets your treatment goals, there are a few extra steps you can take. You can filter the water and measure the turbidity on a turbidity reader, you can look at the clarity and appearance of the water, or you can put it through different micron levels of filters. If the clarity and floc formation do not meet your treatment goals, this typically means that other coagulants or flocculants need to be evaluated. Select additional products and proceed with steps 3-16 until the desired treatment is achieved.

Next Steps

Interpreting results depends on the unique waste stream and treatment goals. Sometimes the water needs to be crystal-clear, and other times it needs to be semi-clear.

It is important that observations of jar testing take into consideration the design of the actual treatment system, and that the best effort is made to replicate real-life treatment scenarios. Chemical contact time, mixing energy, settling time, volume of solids, solid dewaterability, and shearing potential are examples of factors that need to be taken into consideration when jar testing.

Looking for assistance conducting a jar test? Do you have samples you'd like our lab to test for you? Get in contact with our lab team today.

Contact Our Water Treatment Team